Sharpening Crosscut Saws
Setting or sharpening crosscut saws is a job for an expert, but in some isolated regions experienced filers are not available. Saws must, however, be kept in good repair. With this in mind, all material in this section has been compiled as an aid to the beginner for whatsover value it may be to him. The expert filer who has worked out his own methods of saw filing, it is hoped, will readily grant the value and reason for the data although he might not agree in all particulars with the instructions given.
General
Crosscut saw teeth must be filed or fitted to suit the kind of timber to be cut. Shorter rakers (drags) and flatter bevel on the teeth and a greater set is needed to cut softwood than hardwood, or my wood. More set is also needed to cut pitchy wood than nonresinous species.
The Operation
To properly fit or file a crosscut saw, the operations in the order listed are necessary. Each one is very important and calls for application of particular pains upon the part of the filer.
First—Jointing teeth.
Second—Dressing the rakers.
Third—Filing.
Fourth—Setting.


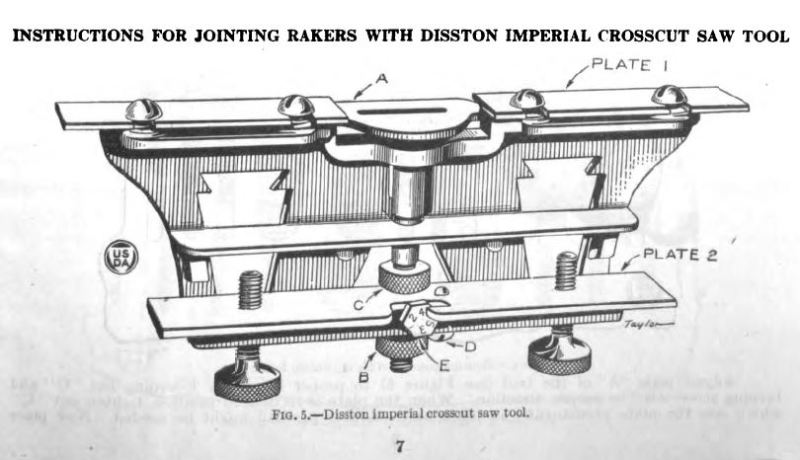
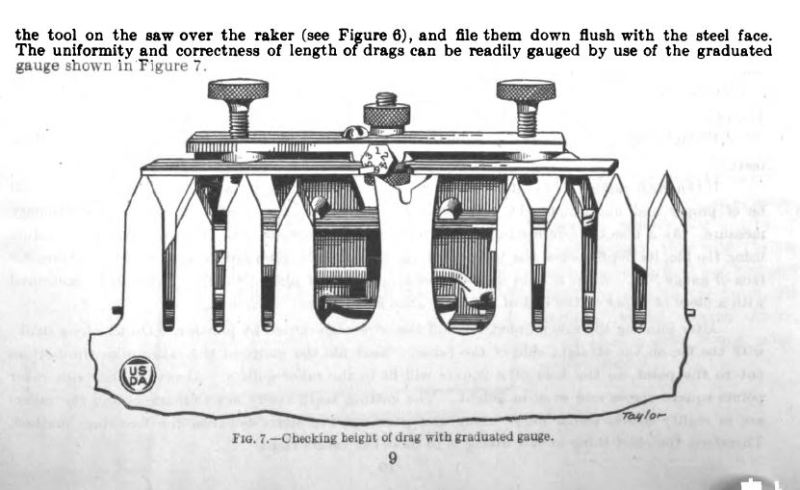
To dress rakers, place the glide (No. 2) in such position on the body of the tool that the raker teeth will project through the slot in the slide the amount desired and then file the points even with the hardened surface of the slide. Thig operation is called jointing the rakers. The raker teeth can be made longer or shorter by moving the slide one way or another. To move the slide loosen the screws, No. 3, which will allow slide to move freely. When the raker teeth project through the proper amount (WI-a inch to inch for hardwood; inch to inch for softwood), fasten the slide in position by tightening the screws. After the rakers have been jointed, to check the length, the gauge screw (No. 1) can be used by tightening nut (No. 4), the screws to be held in place so as to assure uniformity of gauging
throughout.